
Introduction
Aluminum is everywhere in modern manufacturing. From automotive engine components to aerospace parts to consumer electronics, aluminum’s combination of light weight, strength, and corrosion resistance makes it the material of choice for countless applications. But cleaning aluminum parts presents unique challenges. Aluminum is softer and more chemically reactive than steel, and the wrong cleaning method can cause etching, discoloration, or surface damage. Ultrasonic cleaning offers a fast, thorough, and non-abrasive way to clean aluminum parts—but only if you do it right. In this guide, we cover the essential do’s and don’ts of cleaning aluminum parts with an industrial ultrasonic cleaner, so you can get great results without damaging your parts.
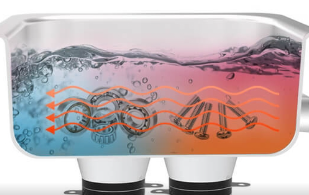
Why Aluminum Cleaning Is Different
The Properties of Aluminum That Matter for Cleaning
Aluminum is a remarkable metal, but some of its best properties are also what make it tricky to clean:
Softness: Aluminum is much softer than steel. This means abrasive cleaning methods—wire brushing, bead blasting, even aggressive scrubbing—can easily scratch, gouge, or deform the surface.
Chemical reactivity: Aluminum is amphoteric, meaning it reacts with both strong acids and strong bases. This limits the range of cleaning chemicals that can be used safely.
Oxide layer: Aluminum naturally forms a thin, protective oxide layer on its surface. While this layer provides corrosion resistance, it can also be affected by certain cleaning processes.
Porosity: Some aluminum castings can be porous, which means cleaning solution can become trapped in surface pores and cause problems later.
All of these factors mean that you cannot just use the same cleaning approach you use for steel parts and expect good results with aluminum. Aluminum requires a more careful, tailored approach.
Common Aluminum Cleaning Problems
When aluminum parts are cleaned incorrectly, several problems can occur:
- Etching: Strong alkaline cleaners can dissolve the surface of aluminum, creating a matte, frosted appearance and altering dimensions.
- Discoloration: Improper cleaning can cause brown, black, or white discoloration on aluminum surfaces.
- Pitting: Corrosive cleaners or prolonged exposure to inappropriate chemicals can cause pitting—small holes in the surface.
- Smut: Some cleaning processes leave a black or gray smut (residue) on the aluminum surface that must be removed.
- Water spots: If not properly rinsed and dried, aluminum parts can develop water spots that mar the finish.
The good news is that with the right equipment, detergent, and process parameters, ultrasonic cleaning machine technology can clean aluminum parts thoroughly without any of these problems.
The Do’s of Ultrasonic Aluminum Cleaning
Do Choose the Right Frequency
Frequency selection is one of the most important factors when cleaning aluminum with ultrasonics. Here is what you need to know:
- Higher frequencies are gentler: Higher frequencies (40 kHz and above) produce smaller, gentler cavitation bubbles that are less likely to cause surface erosion on soft aluminum.
- Lower frequencies are more aggressive: Frequencies below 30 kHz produce larger, more energetic bubbles that can cause surface effects on aluminum, especially with prolonged exposure.
- Recommended frequency for aluminum: For most aluminum cleaning applications, 40 kHz is the sweet spot. It provides enough cleaning power to remove most soils while being gentle enough to avoid surface damage. For very delicate or highly polished aluminum parts, 60–80 kHz may be appropriate.
If you are using a 28 kHz industrial ultrasonic cleaner and notice surface changes on aluminum parts, try reducing the cycle time or switching to a higher frequency machine.
Do Use Aluminum-Safe Detergents
This cannot be emphasized enough: always use a detergent that is specifically formulated for use with aluminum.
- pH-neutral or mildly alkaline (pH 7–9)
- Formulated specifically for aluminum or “multi-metal” use
- Contains corrosion inhibitors
- Free of strong alkalis like sodium hydroxide (caustic soda)
- Strong alkaline cleaners (pH 11+)
- Cleaners containing caustic soda (NaOH)
- Acidic cleaners (unless specifically formulated for aluminum)
- Solvents that may attack aluminum or its coatings
The right detergent will clean effectively without attacking the aluminum surface. The wrong detergent can etch, discolor, or even dissolve the part—especially at elevated temperatures and with prolonged exposure.
Do Control the Temperature
Temperature is another critical parameter for aluminum cleaning. While heat improves cleaning performance, it also accelerates chemical reactions—including the reactions that can cause etching and discoloration.
Recommended temperature range for aluminum: 45–60°C (113–140°F)
At these temperatures, you get most of the benefit of heat—better detergent activity, lower surface tension, improved cavitation—without the risk of chemical attack on the aluminum surface.
Avoid temperatures above 65°C for extended periods when cleaning aluminum, especially with alkaline detergents. Higher temperatures significantly increase the risk of etching and discoloration.
Do Use Proper Rinsing and Drying
Proper rinsing and drying are essential for good results with aluminum parts:
- Rinse thoroughly: After ultrasonic cleaning, rinse parts thoroughly with clean water to remove all detergent residue. Any detergent left on the surface can cause spotting or discoloration as it dries.
- Use deionized water for final rinse: For best results—especially on polished or critical surfaces—use deionized water for the final rinse. Deionized water has no dissolved minerals, so it will not leave water spots.
- Dry immediately: Dry parts promptly after rinsing to prevent water spots and oxidation. Compressed air blow-off is the most common method. For critical applications, a hot air dryer may be preferred.
- Apply corrosion protection if needed: If parts will be stored for an extended period before use, consider applying a light oil or corrosion inhibitor to prevent oxidation.
Do Test First
Whenever you are cleaning a new type of aluminum part or using a new detergent, always test first.
How to test:
- Clean a sample part or scrap piece of the same material
- Use the proposed time, temperature, and detergent concentration
- Inspect the part carefully for any changes in appearance, dimensions, or surface finish
- If you see any issues, adjust the parameters and test again
Testing takes a little extra time, but it can save you from ruining an entire batch of expensive parts.
The Don’ts of Ultrasonic Aluminum Cleaning
Don’t Use Strong Alkaline Cleaners
This is the number one mistake people make when cleaning aluminum. Strong alkaline cleaners—like the heavy-duty degreasers commonly used for steel parts—will etch aluminum surfaces.
The chemical reaction is straightforward: aluminum reacts with sodium hydroxide (caustic soda), a common ingredient in heavy-duty alkaline cleaners, to produce hydrogen gas and sodium aluminate. This reaction dissolves the aluminum surface, creating a matte, etched appearance and altering dimensions.
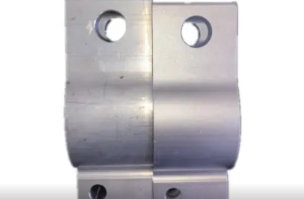
Even cleaners that are safe for steel can be damaging to aluminum. Always check the label and make sure the detergent is rated for aluminum use.
Don’t Overclean
More is not always better. Leaving aluminum parts in the ultrasonic cleaner for too long can cause surface changes, even with aluminum-safe detergents.
Signs of overcleaning:
- Dull or matte appearance on previously shiny surfaces
- Slight change in color or texture
- Rounded edges on sharp features
- Weight loss (measurable with very long exposures)
Best practice: Start with a conservative cycle time and increase only if needed. It is better to run two short cycles than one very long cycle that might damage parts.
Don’t Ignore Solution Concentration
Using too much detergent can be just as bad as using the wrong detergent. Higher concentrations mean more active chemicals in the solution, which increases the risk of chemical attack on aluminum.
Follow the manufacturer’s recommendations: Always use the detergent at the concentration recommended by the manufacturer. Resist the temptation to add extra detergent for “better cleaning”—it usually does not help and may cause problems.
Monitor concentration regularly: Solution concentration can change over time due to evaporation, drag-out, and chemical breakdown. Check concentration regularly and adjust as needed.
Don’t Clean Mixed Materials Without Care
If you are cleaning a batch that contains both aluminum and steel parts, be aware of galvanic corrosion. When two dissimilar metals are in contact in a conductive solution (like detergent water), a small electrical current flows between them, which can cause corrosion of the more reactive metal—in this case, aluminum.
Best practices for mixed batches:
- Avoid mixing aluminum and steel in the same bath when possible
- If you must mix them, make sure parts are not in direct metal-to-metal contact
- Use a detergent with good corrosion inhibitors
- Keep cycle times as short as possible
- Rinse and dry promptly after cleaning
Don’t Forget About Cast Aluminum vs. Wrought Aluminum
Not all aluminum is the same. Cast aluminum and wrought aluminum have different properties and may respond differently to cleaning.
Cast aluminum: Typically has more silicon and other alloying elements, may be more porous, and can have different surface characteristics. Some cast aluminum alloys are more prone to staining and discoloration during cleaning.
Wrought aluminum: Generally more uniform in composition, with a denser, smoother surface. Usually responds well to ultrasonic cleaning.
If you are working with cast aluminum, pay extra attention to detergent selection and process parameters. You may need to adjust the concentration, temperature, or cycle time to get good results without discoloration.
Optimizing Your Aluminum Cleaning Process
Step-by-Step Best Practice Process
Here is a proven process for cleaning aluminum parts with ultrasonics:
Troubleshooting Common Issues
Likely cause: Detergent residue or oxidation
Solution: Improve rinsing, use deionized water for final rinse, dry immediately
Likely cause: Detergent too strong, temperature too high, or cycle too long
Solution: Switch to a milder detergent, reduce temperature, shorten cycle time
Likely cause: Reaction between detergent and aluminum alloy constituents
Solution: Try a different detergent formulated for your specific aluminum alloy, or add a desmutting step
Likely cause: Cycle time too short, temperature too low, or detergent concentration wrong
Solution: Gradually increase cycle time, verify temperature, check detergent concentration
Mechanical Control Ultrasonic Cleaning Machine
Short Description:
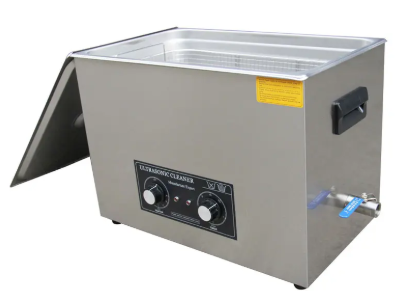
Ultrasonic cleaning is extremely effective at removing dirt and grime—even in the smallest of crevices. It’s high-performance cleaning that cleans your parts faster and cheaper than the alternatives.The equipment volume ranges from 2 liters to 30 liters. If you need a larger volume cleaning machine, please check other catalogs.
Conclusion
Cleaning aluminum parts with an ultrasonic cleaning machine can produce excellent results—thorough, uniform cleaning without abrasion or mechanical damage. But aluminum’s unique properties mean you cannot just use the same process you use for steel parts.
By following the do’s—choosing the right frequency, using aluminum-safe detergents, controlling temperature, rinsing and drying properly, and testing first—and avoiding the don’ts—strong alkalis, overcleaning, excessive concentration, and careless mixed-metal processing—you can get consistently great results with your aluminum parts.
The key is to treat aluminum cleaning as a specialized process that deserves its own parameters and procedures. With the right setup and proper technique, ultrasonic cleaning is one of the best methods available for cleaning aluminum parts quickly, thoroughly, and safely.
To learn more about ultrasonic cleaning solutions for aluminum parts and to find the right system for your application, visit Tense to explore the TS Series of industrial ultrasonic cleaners.
FAQ
Q: Can ultrasonic cleaning damage aluminum parts?
A: When properly configured with the right frequency, detergent, and temperature, ultrasonic cleaning is safe for aluminum parts. However, using the wrong detergent (especially strong alkalis), too high a temperature, or excessively long cycle times can cause etching or discoloration.
Q: What frequency is best for cleaning aluminum?
A: For most aluminum cleaning applications, 40 kHz is the recommended frequency. It provides good cleaning power while being gentle enough to avoid surface damage. For very delicate or highly polished parts, 60–80 kHz may be appropriate.
Q: How do I know if a detergent is safe for aluminum?
A: Check the product label and safety data sheet (SDS). Look for detergents labeled “aluminum-safe,” “multi-metal,” or “pH-neutral.” Avoid products with high pH (above 10) or those containing sodium hydroxide (caustic soda).
Q: Can I clean aluminum and steel parts together?
A: It is generally not recommended to clean aluminum and steel parts in the same bath due to the risk of galvanic corrosion. If you must mix them, prevent direct metal-to-metal contact, use a detergent with corrosion inhibitors, and keep cycle times short.
Post time: Sep-07-2026