
Introduction
Operators spend most of their attention on the wash stage—the ultrasonic frequency, the detergent, the temperature, the cycle time. Yet in many shops, the most common quality failures happen after the ultrasonics have already done their job perfectly. Parts that were genuinely clean emerge from the bath and are then let down by a weak rinse or slow drying, leaving detergent film, water spots, trapped contaminants, and flash rust. Rinsing and drying are not optional finishing touches; they are integral cleaning steps that decide whether the part meets specification. In this guide, we explain what proper rinsing and drying accomplish, how to set them up correctly for different precision levels, and how to integrate them into a complete ultrasonic cleaning machine workflow.
When a part leaves the wash bath, it is coated in detergent solution containing everything just removed: emulsified oil, suspended particles, and dissolved contaminants. Without a thorough rinse, that film simply dries onto the surface. Rinsing performs three distinct jobs:
- ✔ Removes detergent residue that would otherwise leave a film or spots
- ✔ Carries away loosened particles still floating in the boundary layer and trapped in holes
- ✔ Prepares the surface for drying and downstream processes such as inspection, plating, painting, or assembly
The Consequences of Poor Rinsing
A part that is washed perfectly but rinsed badly is, in the end, a part that fails.
The Principles of Effective Rinsing
Rinse with Enough Volume and the Right Flow
Rinsing is a dilution process: each rinse replaces contaminated liquid clinging to the part with cleaner liquid. The key principles are:
- Use enough water: A quick dip does not replace the boundary layer; the part must be flooded and allowed to drain.
- Keep rinse water moving: Stagnant tanks quickly become dirty. Overflowing tanks carry contaminants away.
- Reach every cavity: Orient parts to drain, and use lifting or agitation to flush fresh water in.
Counterflow Rinsing: Doing More with Less Water
Where two rinse tanks are used, arranging them in counterflow dramatically improves efficiency: the dirtiest parts enter the first (dirtier) rinse, while fresh water is fed into the final (cleanest) rinse and overflows backward through the first.
Rinsing by Immersion vs. Spray
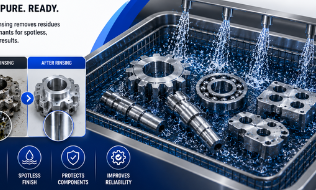
- Immersion rinse: Reaches internal passages and blind holes.
- Spray rinse: Effective on external surfaces, uses less water.
- The best critical-cleaning setups combine both.
Water Quality: The Last Liquid on the Part
Industrial Cabinet Parts Washers TS-P Series
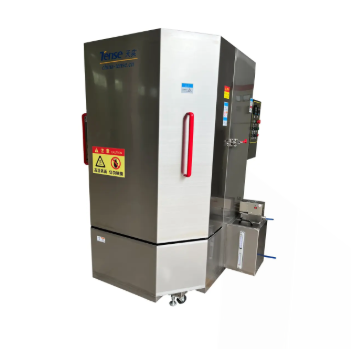
Short Description:
The TS-P series industrial cabinet parts washer is a simplified and lightweight design based on the TS-L-WP series. The operator places the parts on the cleaning cabinet platform and starts up.
During the cleaning process, the basket is driven by the motor to rotate 360 degrees, and the stainless steel nozzles installed in multiple directions are sprayed to wash the parts; the cleaning work is completed within the set time, and the parts can be manually removed by opening the door. The cleaning medium in the tank can be recycled.
Tap Water
Acceptable for non-critical parts, but contains minerals that leave spots and drive corrosion.
Softened Water
Removes hardness but replaces it with sodium; not spot-free.
DI / RO Water
The standard for precision. Removes nearly all dissolved solids for spot-free drying.
Designing the Rinse Sequence
Precision and Remanufacturing Work
For hydraulic components and engine parts, use:
- First rinse: immersion, preferably heated, with overflow.
- Second rinse: counterflow DI/RO water, often with ultrasonic rinse.
- Optional spray: to flush accessible surfaces before drying.
Post time: Nov-12-2026