
Improve Cleaning Results and Extend Equipment Life
Ultrasonic cleaners are widely used in various fields, including industrial, medical, and domestic applications. With prolonged use, the equipment may experience faults or require maintenance, at which point disassembly is necessary. This article will detail the disassembly steps and provide useful precautions to help users disassemble the ultrasonic cleaner safely and efficiently.
1. Reasons for Disassembling the Ultrasonic Cleaner
Before diving into the disassembly steps, it’s important to understand why you may need to disassemble the ultrasonic cleaner. Common reasons include:
Equipment Malfunctions: Such as a damaged ultrasonic generator, failure of the heating function, or leaks in the cleaning tank.
Regular Maintenance: Cleaning the internal components, replacing worn parts (e.g., seals, heating elements), etc.
Upgrades: Replacing the ultrasonic generator with a higher power model or adding new functionality to the unit.
Regular maintenance and disassembly are essential for ensuring the equipment operates efficiently and lasts longer.
2. Preparation Before Disassembly
① Power Off and Ensure Safety
Before disassembling the ultrasonic cleaner, always disconnect the power supply to ensure the equipment is fully powered off. If the unit was recently used, wait for it to cool down to room temperature to avoid burns.
② Prepare Tools
Common tools required for disassembly include screwdrivers (both Phillips and flathead), wrenches, pliers, tweezers, etc. Depending on the model and disassembly requirements, specialized tools like an Allen wrench might also be necessary.
③ Read the User Manual
Different brands and models of ultrasonic cleaners have different structures. It’s highly recommended to read the user manual carefully to understand the structure and key disassembly points for your specific device.
④ Prepare Cleaning Supplies
During disassembly, you may need to clean the interior of the equipment, so it’s a good idea to prepare clean soft cloths, cleaning agents, and water.
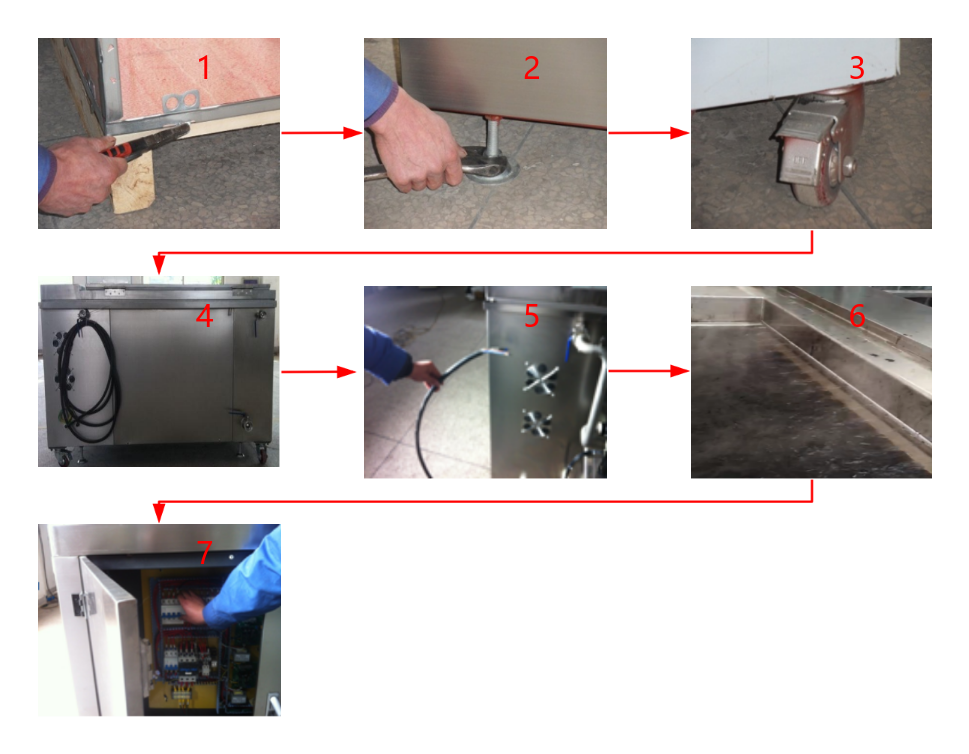
3. Ultrasonic Cleaner Disassembly Steps
① Remove the Outer Shell
Use a screwdriver to unscrew the fasteners on the outer shell and gently remove it. Be careful not to apply excessive force to avoid damaging the outer shell or internal components. If the outer shell has clips, you can gently pry them open with a plastic pry bar.
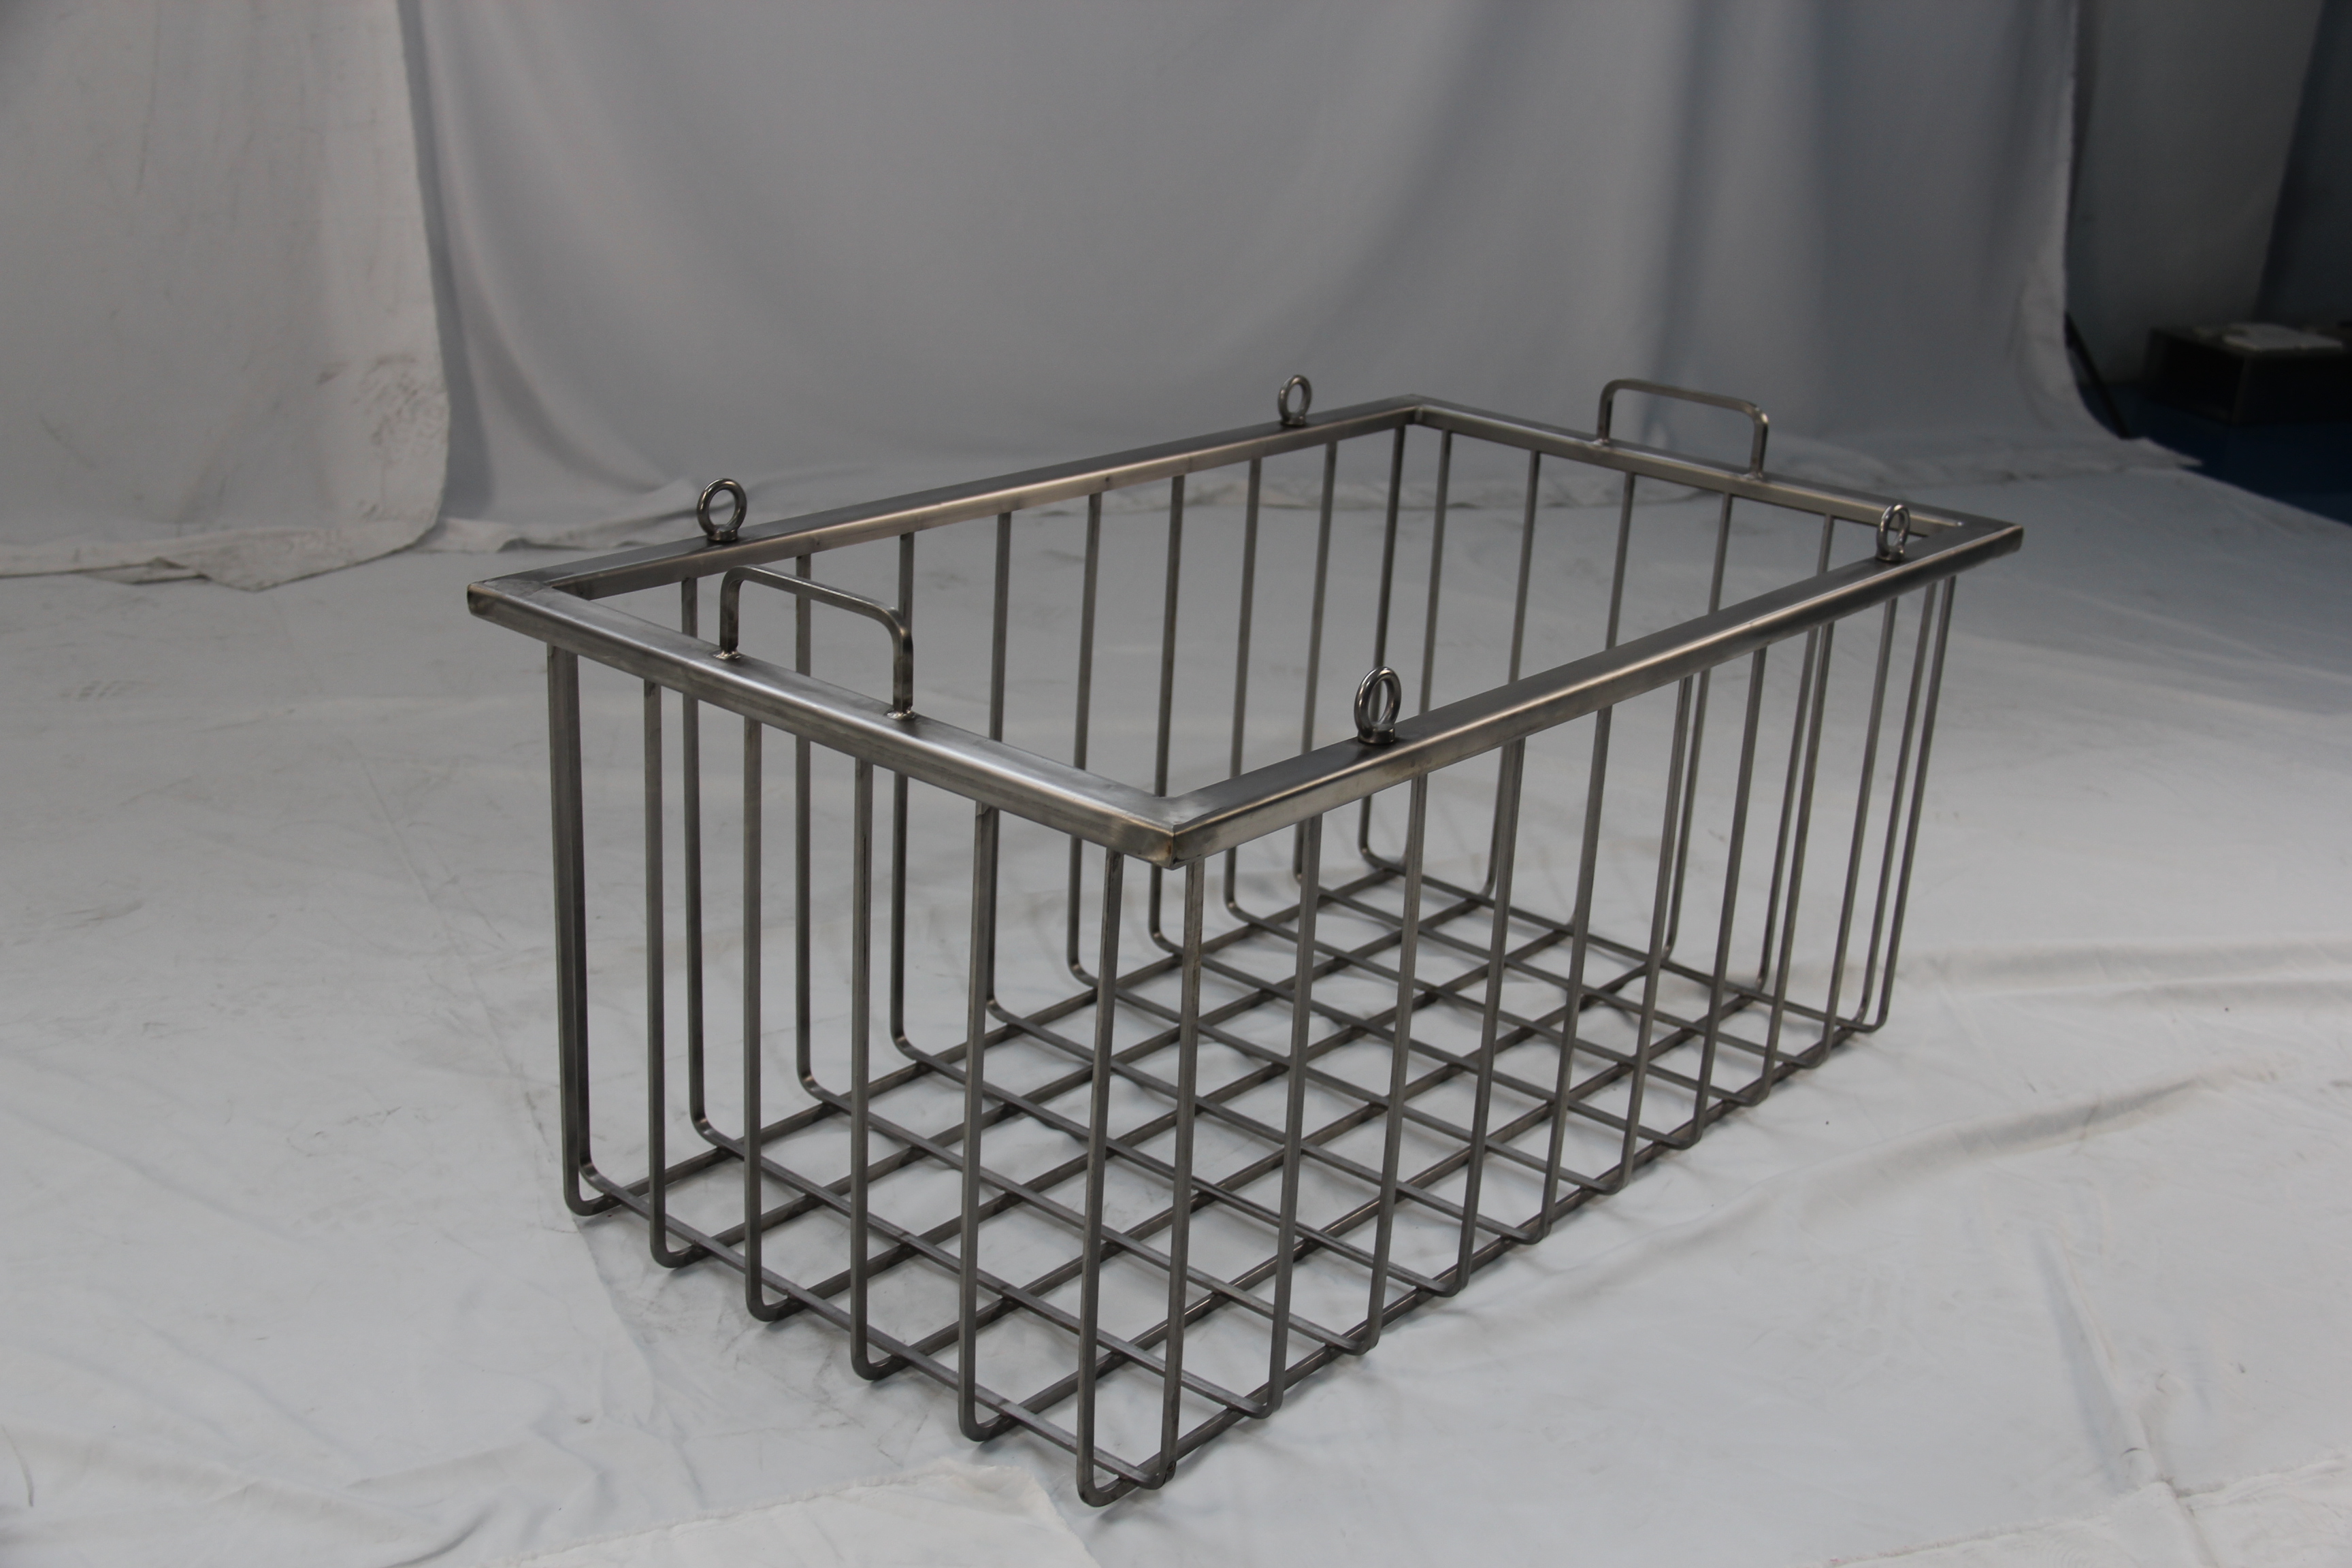
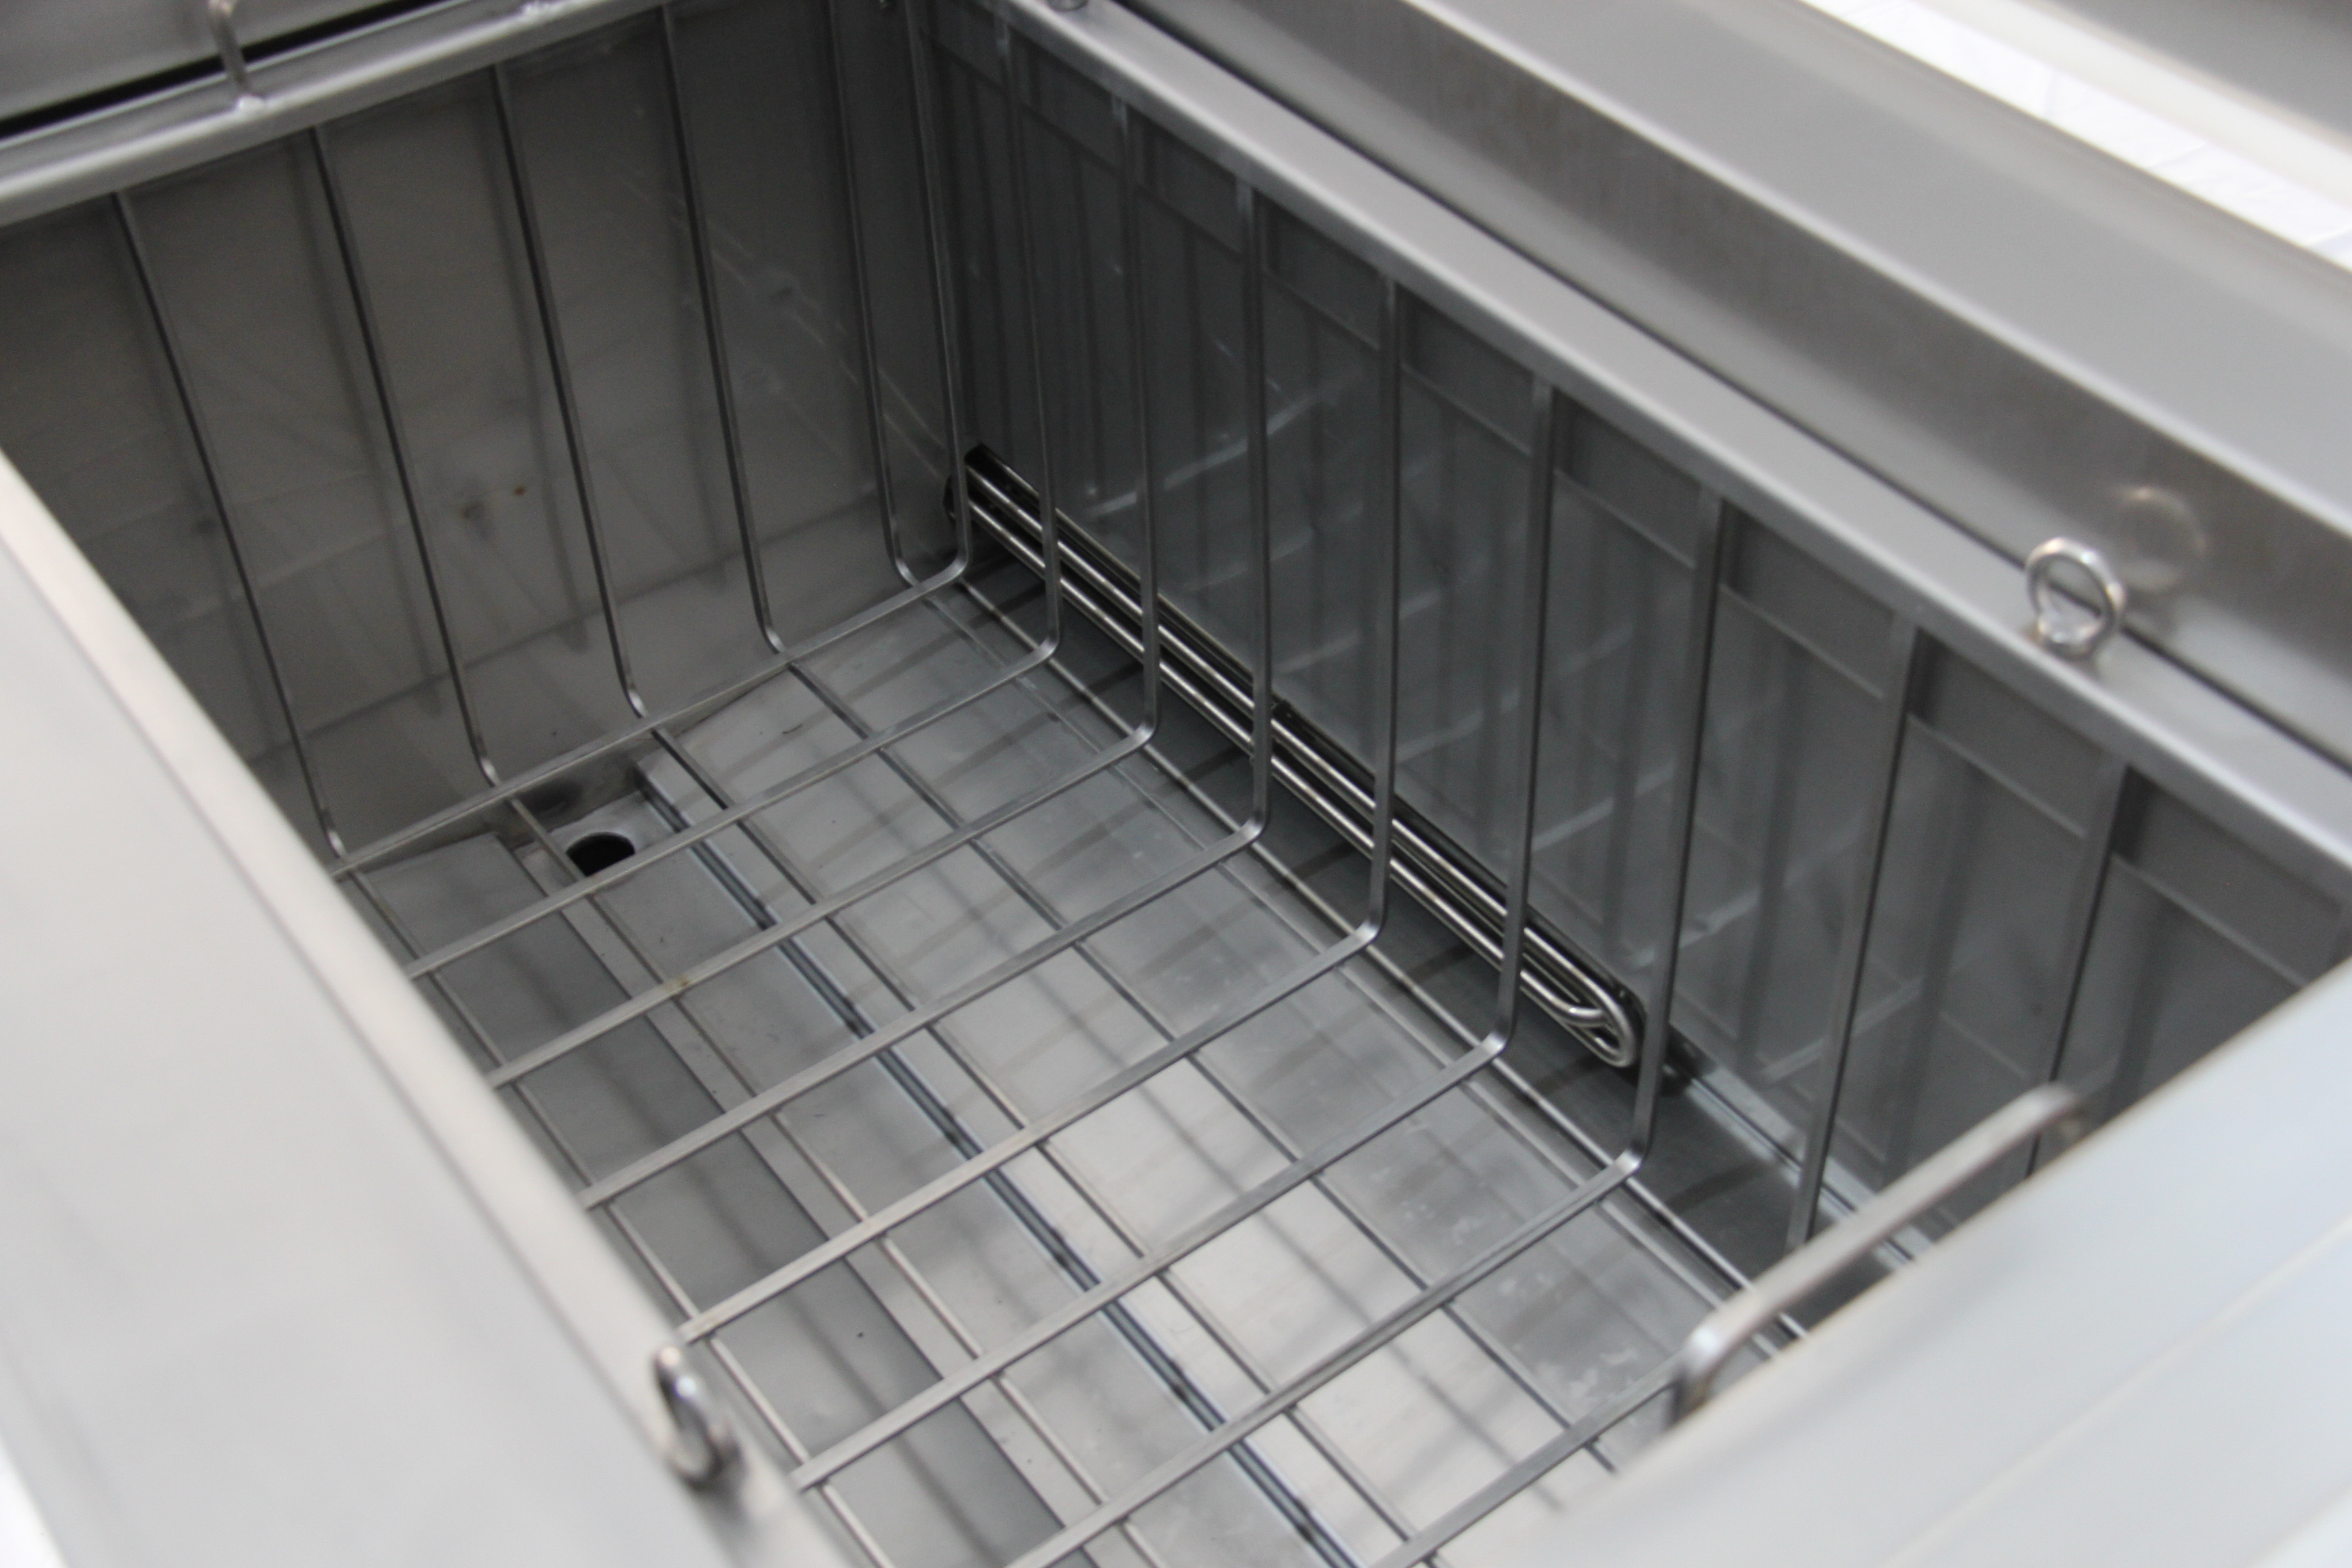
② Remove the Cleaning Tank
The cleaning tank is usually secured to the device base with screws or clips. Unscrew the fasteners or release the clips, and carefully remove the cleaning tank. If the cleaning tank is connected to the ultrasonic generator, make sure to disconnect the connection cables first.
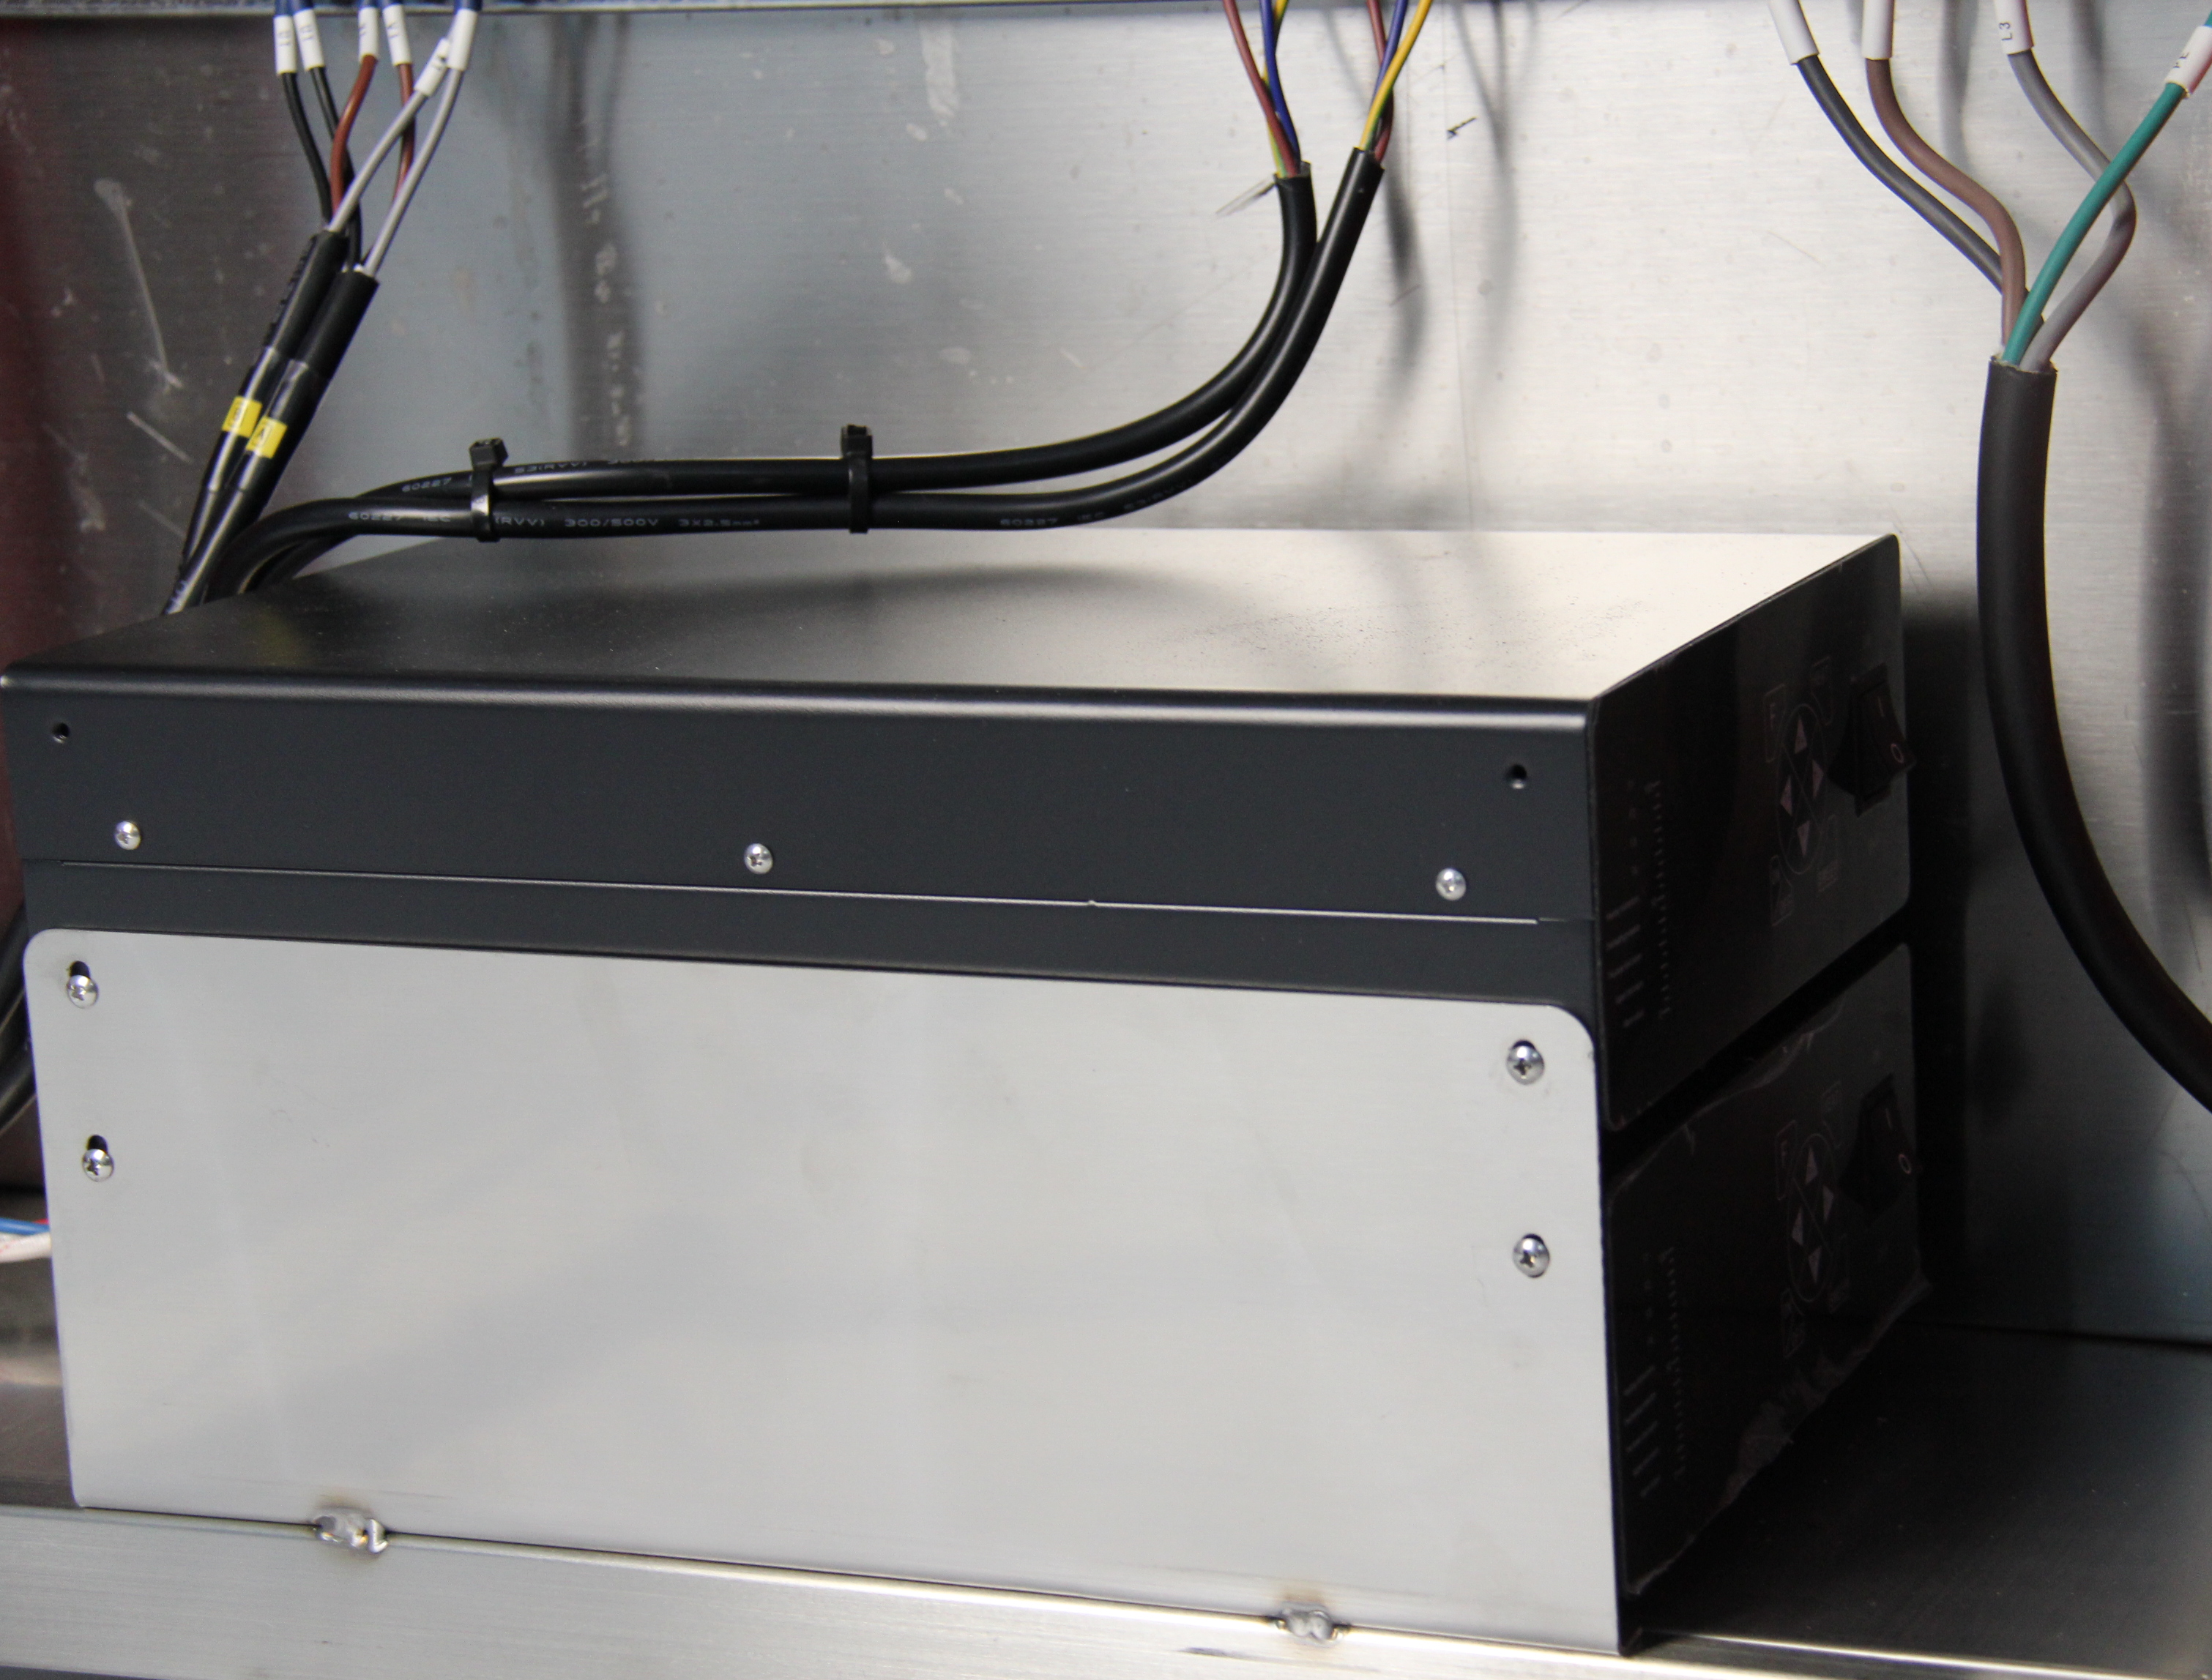
③ Remove the Ultrasonic Generator
The ultrasonic generator is the core component of the device and is typically installed at the bottom or side of the equipment. Disconnect the power and signal cables from the ultrasonic generator, unscrew the fasteners, and carefully remove the generator.
④ Remove the Heating Element
The heating element (e.g., heating tube) is generally installed at the bottom or side of the cleaning tank. Disconnect the power cables, unscrew the fasteners, and carefully remove the heating element.
⑤ Remove Other Components
Depending on the need, remove other components such as temperature sensors, control panels, and water pumps. During disassembly, it’s important to note the position and connection of each component for easy reassembly later.
4. Inspection and Maintenance After Disassembly
① Clean the Interior of the Equipment
Use a clean soft cloth to wipe the interior of the equipment, removing dust and dirt. If there is scale buildup inside the cleaning tank or pipes, you can use a specialized cleaning agent to remove it.
② Inspect Wearable Parts
Check the condition of wear-prone parts like seals, heating tubes, and ultrasonic transducers. If any parts are damaged or worn out, replace them immediately.
③ Test the Function of Each Component
Before reassembling, test components like the ultrasonic generator and heating element to ensure they function properly.
5. Precautions During the Disassembly Process
① Avoid Damaging Internal Parts
Be gentle when disassembling to avoid applying excessive force that could damage parts. Take extra care when handling delicate components, such as the ultrasonic transducer.
② Record the Disassembly Steps
It’s recommended to take photos or notes of each disassembly step to help with reassembly later. For cables and screws, consider labeling them to prevent confusion.
③ Electrical Safety
Ensure that the equipment is powered off when disassembling electrical components, and avoid touching exposed wires. If you’re unfamiliar with electrical work, it’s advisable to seek professional assistance.
④ Follow the User Manual
Since different models of ultrasonic cleaners may vary in structure, always follow the instructions in the user manual for proper disassembly.
6. Common Issues and Solutions
① Stubborn Screws
If screws are rusted and hard to remove, apply a few drops of lubricant and wait a few minutes before attempting again. If the screw is damaged, you can use a screw extractor to remove it.
② Difficulty Disconnecting Cables
Use tweezers or a small screwdriver to gently pry open the cable clips, avoiding pulling on the cables, which could cause damage.
③ Difficulty Reassembling After Disassembly
If you encounter difficulties while reassembling, refer to the photos or notes taken during disassembly to ensure each part is correctly placed.
7. Conclusion
Disassembling an ultrasonic cleaner requires careful attention and patience. By following the steps and precautions outlined in this guide, users can safely and efficiently perform disassembly tasks. Whether for maintenance, repair, or upgrades, understanding the proper disassembly method is crucial for ensuring that the equipment continues to operate effectively.
For more information on ultrasonic cleaners, maintenance tips, and product details, please visit our [Ultrasonic Cleaner Product Page] to learn more about our solutions and services.
Post time: May-08-2025